Leave Your Message

How to Choose Automation Equipment Molds in 2026

Choosing Automation Equipment Molds in 2026 means balancing part quality, production speed, equipment compatibility, and long-term service needs. A mold that looks suitable on a specification sheet may still cause trouble if its mounting dimensions, cooling layout, or ejection system do not match the machine. Fit comes first. Confirm the press or automation cell’s clamping range, available space, connection points, and required cycle time before comparing designs.

Start with the part itself: its material, geometry, wall thickness, expected tolerance, and surface finish. These details influence cavity design, mold steel, cooling channels, and the risk of warping or flash. For example, a thin-walled component may need carefully balanced cooling, while a complex part may require additional slides or a different ejection approach. Ask suppliers for relevant drawings, material recommendations, maintenance requirements, and evidence from comparable applications. Specific documentation is more useful than broad claims about performance.

Also consider what happens after installation. Can technicians reach wear surfaces easily? Are replacement components available? Will sensors and controls communicate reliably with existing equipment? A slightly faster cycle may not justify frequent stoppages or difficult repairs. There is no universally best mold; production volume, part design, and operating conditions change the answer. Some assumptions will need testing. Trial runs, dimensional checks, and a review of early maintenance data can reveal gaps that a quotation cannot. Use these practical checks to compare options and choose a mold suited to the real production environment—not just the advertised cycle rate.
How to Choose Automation Equipment Molds in 2026

Understanding the Role of Molds in Automation Equipment

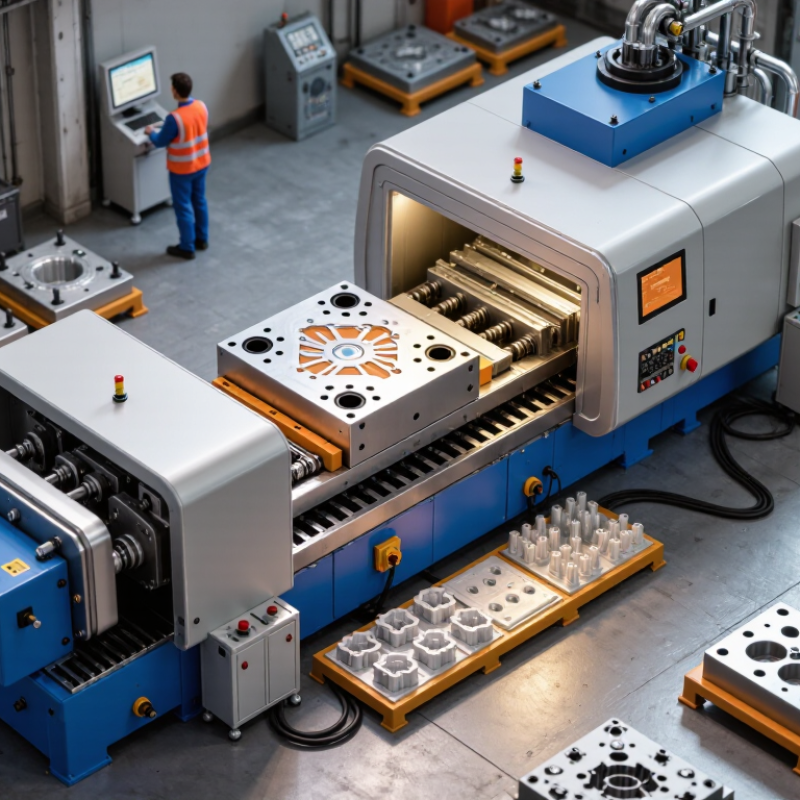
In automation equipment, a mold is more than a shaped cavity. It connects the machine, material, and finished part. Its geometry guides forming, while locating features help it sit consistently in a press or automated station. Small errors can travel downstream: a slight mismatch may cause flash, uneven walls, or parts that resist assembly. That matters when robots need repeatable pickup points.

Choose tooling for the real process, not just the drawing. Check material flow and shrinkage, production volume, operating temperature, clamping force, and space for cooling and ejection. On automated lines, confirm that sensors, grippers, and cleaning access will not conflict with the mold. A durable tool can still be a poor fit if changeovers take too long. I would question overly tight tolerances, too; they can add cost without improving function. Molds wear, and processes drift. Plan for both.

Tips: Before approval, review a sample cycle with operators and maintenance staff. Check part dimensions after repeated runs, not only at startup. Ask how quickly inserts can be replaced. A small detail, perhaps, but downtime makes it matter.

How to Choose Automation Equipment Molds in 2026

Understanding the role of mold materials in heat removal, cycle time, and mold design.

Typical thermal conductivity at room temperature, in W/(m·K). Higher conductivity can help transfer heat away from a mold, but material selection should also account for wear resistance, hardness, corrosion, machining, and operating conditions. Values are representative; actual properties vary by grade and heat treatment.

Defining Product, Material, and Production Requirements

How to Choose Automation Equipment Molds in 2026

Start with the part, not the machine. Record its dimensions, functional surfaces, allowable variation, and expected service life. A thin wall may cool differently from a thick mounting boss. Small details matter. Drawings should also identify surfaces that need a clean finish and areas where marks are acceptable.

Material choice affects mold design. Compare flow behavior, shrinkage, heat resistance, and any fillers with the part’s real operating conditions. A material data sheet is useful, but it cannot replace a test using the intended grade. Fit is critical. Review gate locations, venting, cooling paths, and ejection points together; changing one can affect the others. In a mold review, these practical checks often reveal issues that a machine specification alone misses.

Production requirements shape the final choice. Estimate annual volume, cycle-time targets, changeover frequency, and the level of automation the line can support. A high-output tool may justify multiple cavities, but only if parts fill consistently and downstream handling stays reliable. Ask how wear components will be inspected and replaced. A specification can still miss awkward access for maintenance. That deserves a second look. Before approval, confirm the design with a mold-flow study where appropriate, then validate samples under realistic production settings. One trial rarely answers everything.

Comparing Mold Types and Automation Compatibility

A single-cavity mold is often easier to validate and suits low-volume production or parts that need frequent changes. It gives operators a clear view of filling and cooling behavior. Multi-cavity molds increase output, but every cavity must fill consistently. Watch for uneven part weight, temperature differences, and longer setup checks. Small details count. Family molds can make several related parts in one cycle, yet mismatched sizes or cooling needs may complicate robotic handling.

Automation compatibility depends on more than the mold itself. Check clamp dimensions, ejector alignment, cooling connections, and available space for robot grippers before ordering. Insert molds need reliable placement and confirmation; a sensor can help detect a missing insert before the cycle continues. Progressive dies suit sequential metal-forming operations, but require accurate feeding and safe, repeatable transfer between stations. Run a trial with the actual material and planned cycle speed. Measure part variation, changeover time, and robot access. No mold choice is perfect on paper. I have seen a compact layout look efficient until a gripper could not reach the finished part. Test access early, and leave room for adjustment.

Evaluating Precision, Durability, Safety, and Maintenance

Precision starts with the part, not the mold catalogue. Define critical dimensions, expected cycle time, and acceptable variation before comparing designs. Run sample parts at realistic speeds; a mold that performs well slowly may drift under sustained production. Measure repeatability across several cycles, not just one good piece. Small deviations add up.

Durability depends on material, heat, pressure, and cycle volume. Ask how wear surfaces, guides, and replaceable inserts will be inspected. Safety deserves equal attention: check guarding, pinch points, access for setup, and whether adjustments can be made without reaching into moving areas. Keep it practical. For maintenance, confirm lubrication points are reachable and common wear parts can be replaced without dismantling the whole assembly. Request clear service intervals and a record of past trials. One trade-off is easy to miss: tighter tolerances can raise cost and upkeep without improving the finished product. I would verify the actual process need before specifying them. No mold is maintenance-free. A little uncertainty remains until production data confirms the choice.

How to Choose Automation Equipment Molds in 2026 — Evaluating Precision, Durability, Safety, and Maintenance
Evaluation Dimension What to Assess Practical Evaluation Method Selection Guidance
Dimensional Precision Critical mold dimensions, alignment features, cavity consistency, and the tolerances required by the finished part. Review dimensioned drawings and inspection reports. Check critical features with suitable calibrated measuring equipment, and confirm results across multiple cavities where applicable. Require documented acceptance criteria tied to the part drawing and process. Mold tolerances should be established by the tool designer and manufacturer for the required part tolerances, material, and process—not by a universal rule of thumb.
Repeatability and Process Stability Whether the mold produces consistent parts after setup, during production, and following routine mold changes or maintenance. Run a representative production trial using the intended machine, material, and process settings. Record part measurements, setup conditions, and any adjustments needed. Choose a mold with trial results that meet the agreed acceptance criteria and can be reproduced under documented operating conditions.
Material and Wear Resistance Tool material, heat treatment or surface treatment, expected wear locations, corrosion exposure, and compatibility with the production material. Request material and treatment certificates, identify high-wear areas, and review the manufacturer's evidence for comparable applications and operating conditions. Match the material and treatment to the application. Abrasive or corrosive materials, high contact loads, and frequent cycling can change wear requirements; no single steel grade or hardness is best for every mold.
Service Life and Durability Expected production cycles, maintenance intervals, replaceable components, and the conditions under which any service-life estimate applies. Ask for a written service-life estimate with assumptions, such as material, cycle rate, lubrication, temperature, and maintenance practices. Check references or test records where available. Compare estimates only when their operating assumptions are comparable. Treat cycle-life figures as application-specific estimates, not guarantees, unless the terms and test conditions are clearly documented.
Machine Integration and Safety Mounting and alignment, access for loading or part removal, pinch and crush points, guarding, interlocks, and safety-related control interfaces. Review the mold and machine interface drawings and perform a documented risk assessment for the complete automated cell. Verify guards, interlocks, and control functions during commissioning. Confirm that the integrated equipment meets applicable local requirements. ISO 12100 provides a framework for machinery risk assessment, while ISO 13849-1 addresses safety-related parts of control systems; applicability and required performance depend on the risk assessment and jurisdiction.
Maintenance Accessibility Access to wear parts, fasteners, lubrication points, cooling passages, sensors, and connections that require inspection or replacement. Review maintenance drawings and carry out a planned service task during a design review or trial. Check whether routine work can be completed with the specified tools and safe isolation procedures. Prefer designs with clear service access, identifiable components, and replaceable wear parts. Include safe access and lockout procedures in the maintenance plan.
Cleaning and Contamination Control Residue traps, fluid leakage, corrosion risk, cleaning access, and the cleanliness requirements of the product and production environment. Inspect surfaces, joints, and cavities for areas that are difficult to clean. Confirm compatible cleaning methods and materials with the equipment and process requirements. Select a design that supports the required cleaning frequency and environment. Where hygiene or contamination controls apply, verify the relevant site and sector requirements before purchase.
Spare Parts and Maintenance Support Availability of drawings, parts lists, wear-part identification, repair instructions, and replacement components. Request a recommended spare-parts list, maintenance schedule, and documentation package. Confirm lead times and how replacement parts will be identified and ordered. Compare the full support plan, not just the initial mold price. Clear documentation and predictable access to critical wear parts can reduce avoidable production downtime.
Total Cost of Ownership Purchase and integration costs, planned maintenance, replacement parts, downtime exposure, and expected production requirements. Build a lifecycle comparison using the same production volume, operating assumptions, maintenance scope, and downtime valuation for each option. Choose based on documented lifecycle costs and production needs. A lower purchase price does not necessarily mean a lower cost over the mold's service life.

Verifying Suppliers and Testing the Final Mold Selection

A supplier’s presentation is only a starting point. Verify its machining, heat-treatment, and inspection records, then check material certificates against the mold specification. Ask how it controls cavity dimensions, vent depth, and cooling-channel placement. Paper is not proof. Review a recent inspection report and confirm that its measurement method suits your critical features.

The scale of modern automation makes repeatable tooling essential. The International Federation of Robotics reported 4,281,585 industrial robots operating worldwide in 2023, in its World Robotics 2024 report. Deloitte and MAPI’s 2024 smart manufacturing survey found that 86% of surveyed manufacturing executives viewed smart manufacturing as a competitiveness driver over the next five years. These figures do not prove a mold will perform well. They do show why suppliers should provide traceable, usable process data.

Test shortlisted molds using the intended resin, machine, and production settings. Run enough cycles to reveal temperature drift and inconsistent ejection, not just a polished first shot. Measure critical dimensions across multiple parts, record cycle time, and inspect for flash, sink marks, and warpage. Compare results with agreed acceptance limits. A first trial is not proof. It can also expose a poor assumption in the original specification, so leave room to revise it before final approval.