Choosing Car Mounted Molds in 2026 means balancing part quality, production volume, tooling cost, and changing vehicle designs. The scale is substantial: OICA reported approximately 92.5 million motor vehicles produced worldwide in 2024. Meanwhile, the International Energy Agency’s Global EV Outlook 2025 says electric car sales were expected to exceed 20 million that year. These shifts affect mold decisions. Battery enclosures, interior trims, clips, and exterior panels can require different materials, tolerances, and cooling strategies. One mold rarely suits every part.
A practical evaluation starts with the component drawing and its working conditions. Check resin compatibility, shrinkage, wall thickness, expected cycle time, and the required surface finish. Then ask how the supplier controls steel quality, machining accuracy, mold trials, and dimensional inspection. Request evidence, such as trial reports, sample measurements, and a documented maintenance plan. Details matter. A polished sample alone cannot prove stable production across thousands of cycles.
In 2026, also weigh flexibility. Platform updates and electrification can change part geometry before a tool reaches the end of its planned life. A modular design may simplify revisions, though it can raise initial costs. Compare total ownership costs—not just the quotation—including maintenance, downtime, spare inserts, and shipping. Industry reports describe broad market changes, but they cannot select tooling for your exact part. That judgment needs engineering review and supplier evidence. And, frankly, some assumptions will still be wrong; early mold trials are where teams can catch them.
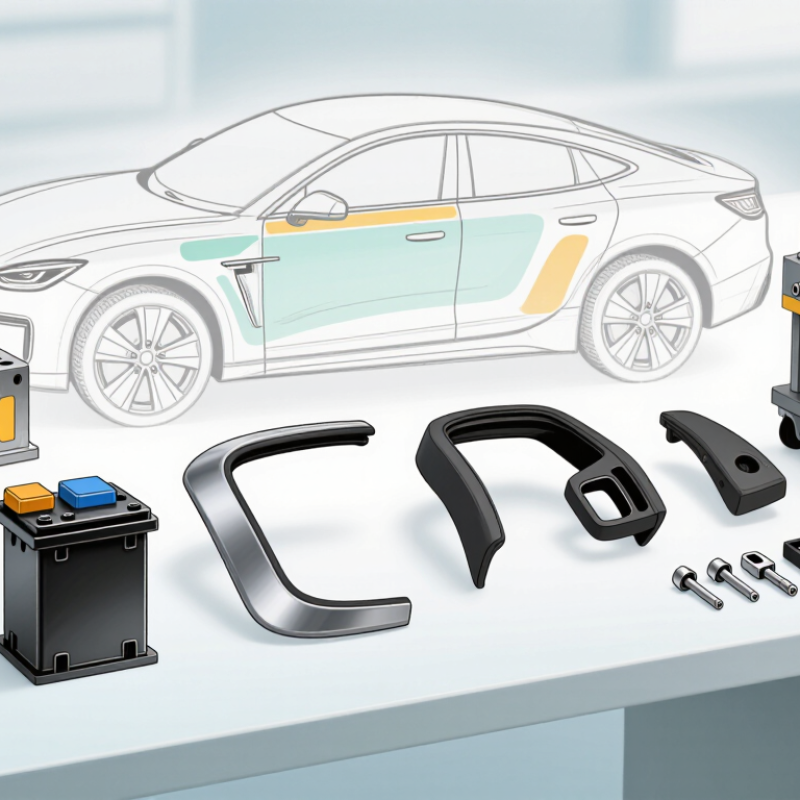
Before comparing car-mounted molds, define the part and where it will operate. A cabin trim piece faces different conditions from an underbody cover. Note the resin, wall thickness, visible surfaces, and expected production volume. Small details matter: a textured finish can hide minor marks, but it may complicate cleaning. Be specific.
Translate those needs into measurable mold requirements. Check cavity count, target cycle time, dimensional tolerances, and the available press or mounting space. If the mold will travel or operate on a vehicle, account for vibration, heat, dust, and secure fixing points. A loose bracket is not a minor issue. It can affect alignment and create inconsistent parts. Verify cooling, venting, and access for routine maintenance before approving the design.
Ask how performance will be tested. Trial parts should be measured at critical features, not judged by appearance alone. Record cycle time, defects, and temperature variation across repeated runs. A first estimate is rarely perfect. Material data and real production conditions can differ, so leave room to adjust gates or cooling channels after testing. I would rather flag uncertainty early than promise a tolerance the process cannot reliably hold.
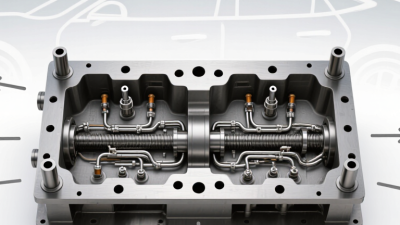
Choosing molds for car-mounted components starts with the part’s shape, material, and expected production volume. A dashboard clip needs different tooling from a broad console panel. Injection molds suit many detailed plastic parts and repeat production. Compression molds can work well for certain composite or rubber components. Match the process to the part, not just the quoted price.
Tool material affects cost, cooling, and service life. Aluminum tooling can support prototypes and shorter runs, while hardened steel often suits demanding, high-volume production. CNC machining creates precise cavities; electrical discharge machining can form narrow ribs and sharp details. Additive manufacturing may help with prototypes or conformal cooling, but it is not automatically the best production choice. Small design details can change the tool plan.
Tips: Ask for a sample part and a written tooling plan. Check expected cycle time, maintenance needs, and how dimensional changes will be handled. A smooth surface looks convincing, but fit matters more.
Before approval, review the parting line, gate location, and ejection marks with the mold maker. These choices can affect visible surfaces and assembly fit. Request inspection data for critical dimensions, such as clip openings or mounting holes. Also confirm which material grade and shrinkage allowance the tool design uses. One point is easy to overlook: early estimates may change after detailed design review. Compare suppliers using the same part data and production assumptions, then document any open questions.
| Mold Type | Typical Automotive Applications | Common Mold Materials | Typical Manufacturing Methods | Key Advantages | Main Limitations | Best Fit |
|---|---|---|---|---|---|---|
| Plastic injection mold | Interior trim, clips, housings, grilles, bezels, and many under-hood plastic components | P20 or pre-hardened tool steel for general production; H13 or other hardened steels for demanding wear or temperature conditions; aluminum for prototypes and lower-volume runs | CNC milling, drilling, grinding, and EDM; polishing or texturing for the required surface finish | Suitable for complex shapes, repeatable dimensions, and high-volume production; supports a wide range of thermoplastics | High initial tooling cost; cooling, gating, and venting need careful design to limit warpage and defects | Plastic parts with moderate to high production volumes |
| Compression mold | Selected rubber or thermoset parts, seals, gaskets, and some composite components | Tool steels such as P20 or H13; material choice depends on molding temperature, pressure, and production volume | CNC machining, drilling, grinding, and polishing; heated tooling and temperature-control features may be incorporated | Can suit relatively large or thick parts and materials that are difficult to process by conventional injection molding | Cycle times are often longer than those of injection molding; flash and part consistency depend on process and tool control | Thermoset, rubber, or composite parts where the material and geometry suit compression processing |
| Die-casting die | Aluminum or magnesium components such as structural brackets, housings, and selected powertrain or chassis parts | Hot-work tool steel, commonly H13 or equivalent grades, selected for thermal fatigue and resistance to heat checking | CNC machining, EDM, grinding, heat treatment, and polishing; cooling channels and replaceable inserts may be used | Produces metal parts with high dimensional repeatability and good production rates, especially for larger runs | High tooling and equipment investment; molten metal temperatures and thermal cycling create demanding die conditions | Non-ferrous metal parts suited to high-pressure die casting and repeat production |
| Blow mold | Hollow plastic parts such as fluid reservoirs, ducts, and selected vehicle tanks or containers | Aluminum is common for many blow molds; steel may be used where greater wear resistance or production durability is needed | CNC machining and drilling; venting and cooling features are designed around the part and process | Efficient for hollow components that would be difficult or impractical to make as a single solid molded part | Part geometry and wall-thickness control are constrained by the blow-molding process | Hollow thermoplastic components made by extrusion or injection blow molding |
| Prototype or bridge-production mold | Design validation, fit checks, pilot builds, and limited production before a final production tool is ready | Machinable aluminum alloys or pre-hardened steel, chosen according to material, part complexity, and expected shot count | CNC machining, additive manufacturing for selected tool features, or a combination of processes | Can shorten early development cycles and allow design changes before committing to hardened production tooling | Tool life and process capability may be lower than those of a production mold; not every resin or geometry is suitable | Low-volume parts, engineering trials, and pre-production evaluation |
| Conformal-cooled mold insert | Inserts for injection molds where cooling time or uneven temperature is a major process concern | Metal powder-bed-fused tool steel or other qualified tool materials; material suitability depends on the molding conditions and post-processing | Metal additive manufacturing followed by heat treatment, machining, finishing, and inspection | Cooling channels can follow part contours more closely than straight drilled channels, potentially improving temperature uniformity | Higher insert cost and additional qualification needs; benefits depend on design, material, and process validation | Complex parts with challenging cooling requirements and sufficient production value to justify the insert |
Material selection, tool life, cycle time, and tooling cost vary with part geometry, resin or metal alloy, surface-finish requirements, production volume, and process conditions. Confirm the final specification with a qualified toolmaker and material supplier.
When choosing car-mounted molds, start with the exact vehicle make, model, year, trim, and mounting location. A shape that looks correct may still miss a clip by a few millimeters. Check mounting-hole spacing, clearance around wiring and sensors, and whether the mold fits with factory panels installed. S&P Global Mobility reported that the average age of light vehicles in the United States reached 12.6 years in 2024. That long vehicle life makes model-year changes important: similar-looking vehicles can use different mounting points. Measure twice.
Next, compare the mold’s technical specifications with the vehicle’s operating conditions. Confirm dimensions, material, temperature range, load rating, and stated tolerances; request a dimensioned drawing rather than relying on product photos. For parts near the engine, exhaust, or cabin electronics, ask how heat, vibration, and moisture affect the material over time. Verify that the supplier’s test conditions match your intended use. A tolerance figure without a measurement method is not very useful. SAE International’s technical standards provide established engineering terminology and test practices, but the relevant standard depends on the component and application. If specifications are incomplete, treat compatibility as unverified, not assumed. Even a careful fit check can miss an issue after repeated heat cycles.
When comparing automotive mold suppliers, ask for evidence, not just a polished capability deck. Request recent dimensional inspection reports, steel certificates, mold-flow findings, and records from sample runs. Check whether inspection methods and corrective actions are documented under a quality system such as IATF 16949. That matters. A certificate alone cannot prove a mold will meet your part’s tolerances. Review a sample part yourself, especially around ribs, clips, and visible surfaces.
Lead times need the same scrutiny as quality. Ask suppliers to break the schedule into design review, steel preparation, machining, assembly, trial shots, and revisions. Confirm what happens if the first sample fails.
McKinsey’s 2020 report on global value chains found that 93% of surveyed supply-chain leaders planned to increase resilience, while 90% planned greater regionalization. Those figures are not mold-specific, but they underline why backup capacity and clear handoffs matter.
Check where design, tooling, and sampling actually happen. A short quoted lead time can hide a long queue. I would also ask for weekly milestone updates; still, updates cannot replace a physical trial.
A car-mounted mold should be judged by repeatable performance, not its quote alone. Ask for inspection records, material details, and trial-run data from comparable parts.
During sampling, check critical dimensions at several points, then repeat after the mold warms. A cold first shot can look fine.
Small gaps matter. Monitor flash, sink marks, and cycle variation; one acceptable sample proves little.
Maintenance needs should be clear before purchase. Request a schedule for cleaning vents, lubricating guides, checking clamps, and replacing wear components.
Confirm whether inserts and common spares can be changed without shipping the full tool away. That detail can save days.
Keep a simple log of cycles, repairs, and recurring defects. It may feel fussy, but vague maintenance promises often become expensive surprises.
Compare total ownership costs across expected production volume, not just initial price. Include installation, operator training, energy use, inspection labor, spare parts, storage, and downtime.
Ask suppliers to price a realistic repair, too. Then compare cost per acceptable part under normal and high-volume conditions.
Forecasts are imperfect; scrap rates can shift after material or process changes. I would keep a contingency line, even when the spreadsheet looks tidy.